Steering
Ignition Lock
The ignition lock operates the Ignition Switch.
Location
The ignition lock is mounted on the tripe clamp top in the center between the steering head and the dash.
The Ignition Switch connects to a ZADI motorcycle lock with a steering lock feature and parking light enable (although the parking light enable is not connected on the Zero).
Key Blanks
Key blanks can typically be ordered from a dealer.
Key blanks appear to be available generically as JMA ZA9P1 FOR ZADI ZD23RCP.
In USA, calling them "Triumph" keys may help a locksmith find the right blank.
Maintenance
Occasional lock lubrication is recommended, and inspection of the wires for startup enable on the underside of the lock for reliability.
Troubleshooting
See the faulty ignition switch troubleshooting guide for issues with this.
Tank Lock
The tank lock on the FST Platform is accessed on the left side of the tank, and is keyed the same as the ignition and the seat lock.
Mirrors
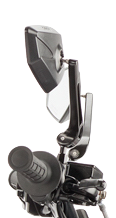 2012-2014 Mirrors (side) on a DS |
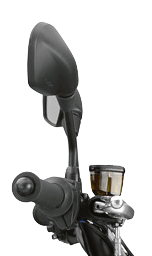 2015+ mirrors (side) on a DSR |
Design
Pre-2015 (Gen1) Zeros use an angular mirror with a ball mount joint that allows rotating the mirrors 360 degrees.
Many riders turn the mirrors upside down for a little wider visibility around the shoulder/arms.
2015+ (Gen2 and Gen3) Zeros use a mirror stalk with an inboard ball mount with about 30 degrees of freedom from the stalk.
Mount
Zero mirrors are mounted from the handlebars with Yamaha/Ducati-style bolt fitting.
The bolt/thread specification is M10x1.25, left-hand-threaded on the right side and standard right-hand-threaded on the left side.
Maintenance
(pre-2015) Check that the set screw holding mirror position holds it firmly.
Use a corrosion inhibitor or thread-locker for the set screws and the mount threading since these are weather-exposed.
See Third-Party Mirrors for workable/tested replacements.
Handlebar
Zero's models all steer with a handlebar.
S/SR and FXS models share a shorter, sportier handlebar shape.
DS/DSR and FX models share a wider, straighter handlebar shape.
Both S/FXS and DS/FX style handlebars are standard through-bars.
Diameters
- 1 1/8" (28mm) ⌀ center bar.
- 7/8" (22mm) ⌀ outer bar.
| Models | Years | Width | Rise | Pullback |
|---|---|---|---|---|
| S,SR,FXS | 2013-present | |||
| DS,DSR,FX | 2013-present | |||
| SRF,SRS | 2020-present |
Control-Indexing Holes
- (1) 3/16" ⌀ on the left for the switchgear, 6.5" from the end of the bar.
- (1) 3/16" ⌀ on the right inner for the throttle, 7 3/16" from the bar end.
- (1) 5/32" ⌀ on the right outer for the switches, 6" from the bar end.
References
Handlebar Clamps
The SDS and XMX platform handlebar clamps are 2" by 1 1/8" (28mm) for the entire line of models, clamped with M10 cap screw bolts (35mm length; possibly 50mm?).
Handlebar Switch Assemblies
The switch assemblies are fastened with TT20 (1/4") tamper-resistant Torx bolts through the underside.
Handgrips
Handgrips have a Zero logo on them but otherwise are reasonably good stock grips for the 7/8" (22mm) handlebar width at the end of the bars.
Bar Ends
For 2014+ models, any bar end accessories that match the 14mm inner diameter will fit.
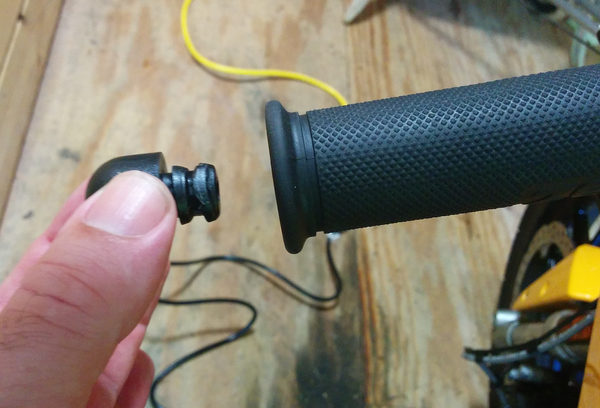 2014+ stock bar end plugs
The stock bar ends are round plastic bumpers held in by plastic threads, so can be removed with a little twisting and pulling.
2013 models
Bar ends are covered by the grip so are not easily changed without changing the grips.
Zero did offer heated grips for these models but dropped them after changing the bars in 2014.
Brake Lever
Zero motorcycles have a right-hand lever for the front brake, as is common for motorcycle designs.
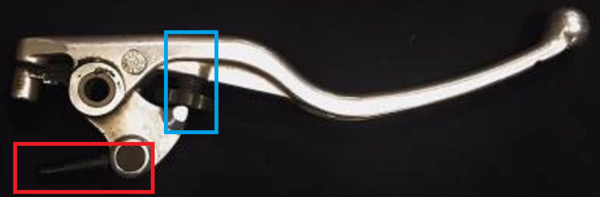 Brake Lever
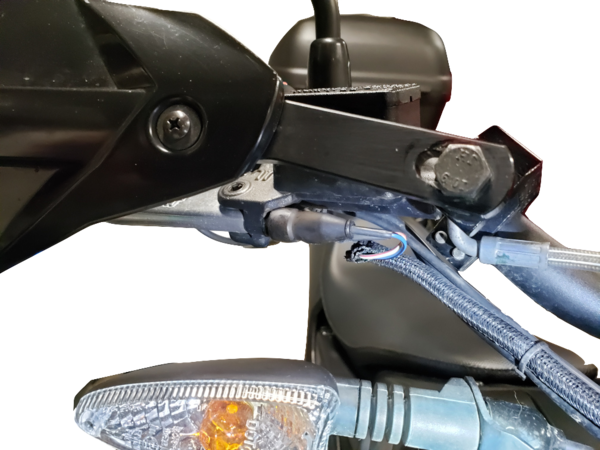 Brake Lever Switch
Primary adjustment
The brake lever has a dial for adjusting the lever position relative to pad pressure and rider finger reach.
Set it however lets you operate it comfortably and safely.
Brake Light and Regen Switch
A set screw on the inside of the lever adjusts how a micro-switch is depressed.
The micro-switch is what activates the rear brake light and the "braking regen" mode at the same time.
Any adjustment or replacement of the brake lever should be followed by recalibrating this set screw to get the desired effect.
Too much free play and the switch will activate when going over bumps and result in a slightly jerky ride.
There is some guidance on how to adjust this: Brake Lever Adjustment to Regen Before Pad Contact.
NOTE: It seems like there's small difference in how this set screw is secured in stock lever compared to replacement lever (2016 SR), even though they look identical.
I wasn't able to adjust this screw on stock lever, however replacement lever adjusts with no issues.
You will need 7/64 SAE hex key to adjust.
Use some light threadlock compound (Blue Loctite will do) to fix the set screw in the desired position if it seems to move too freely out of the desired range.
References
Adjustment
See Front Brake Lever Adjustment
Removal, Repair
See Front Brake Lever Replacement
Triple Clamp
FST Platform/Triple Clamp
Steering Head
FST Platform/Steering Head
Steering Head Bearing
FST Platform/Steering Head Bearing
Front Fender
FST Platform/Front Fender
Source: zeromanual.com/wiki/FST_Platform/Unofficial_Service_Manual · Wayback capture of 2025-05-17 · wiki last edited 2 May 2020 00:04. Community-written content from the Unofficial Zero Manual, reproduced for preservation; not written or verified by OpenZero. Links to pages that were not mirrored go to the Wayback Machine.