Electrical System
Lights and Signals
Headlamp
Zero's models ship with halogen bulbs.
X Platform Headlamp
Pre-2014
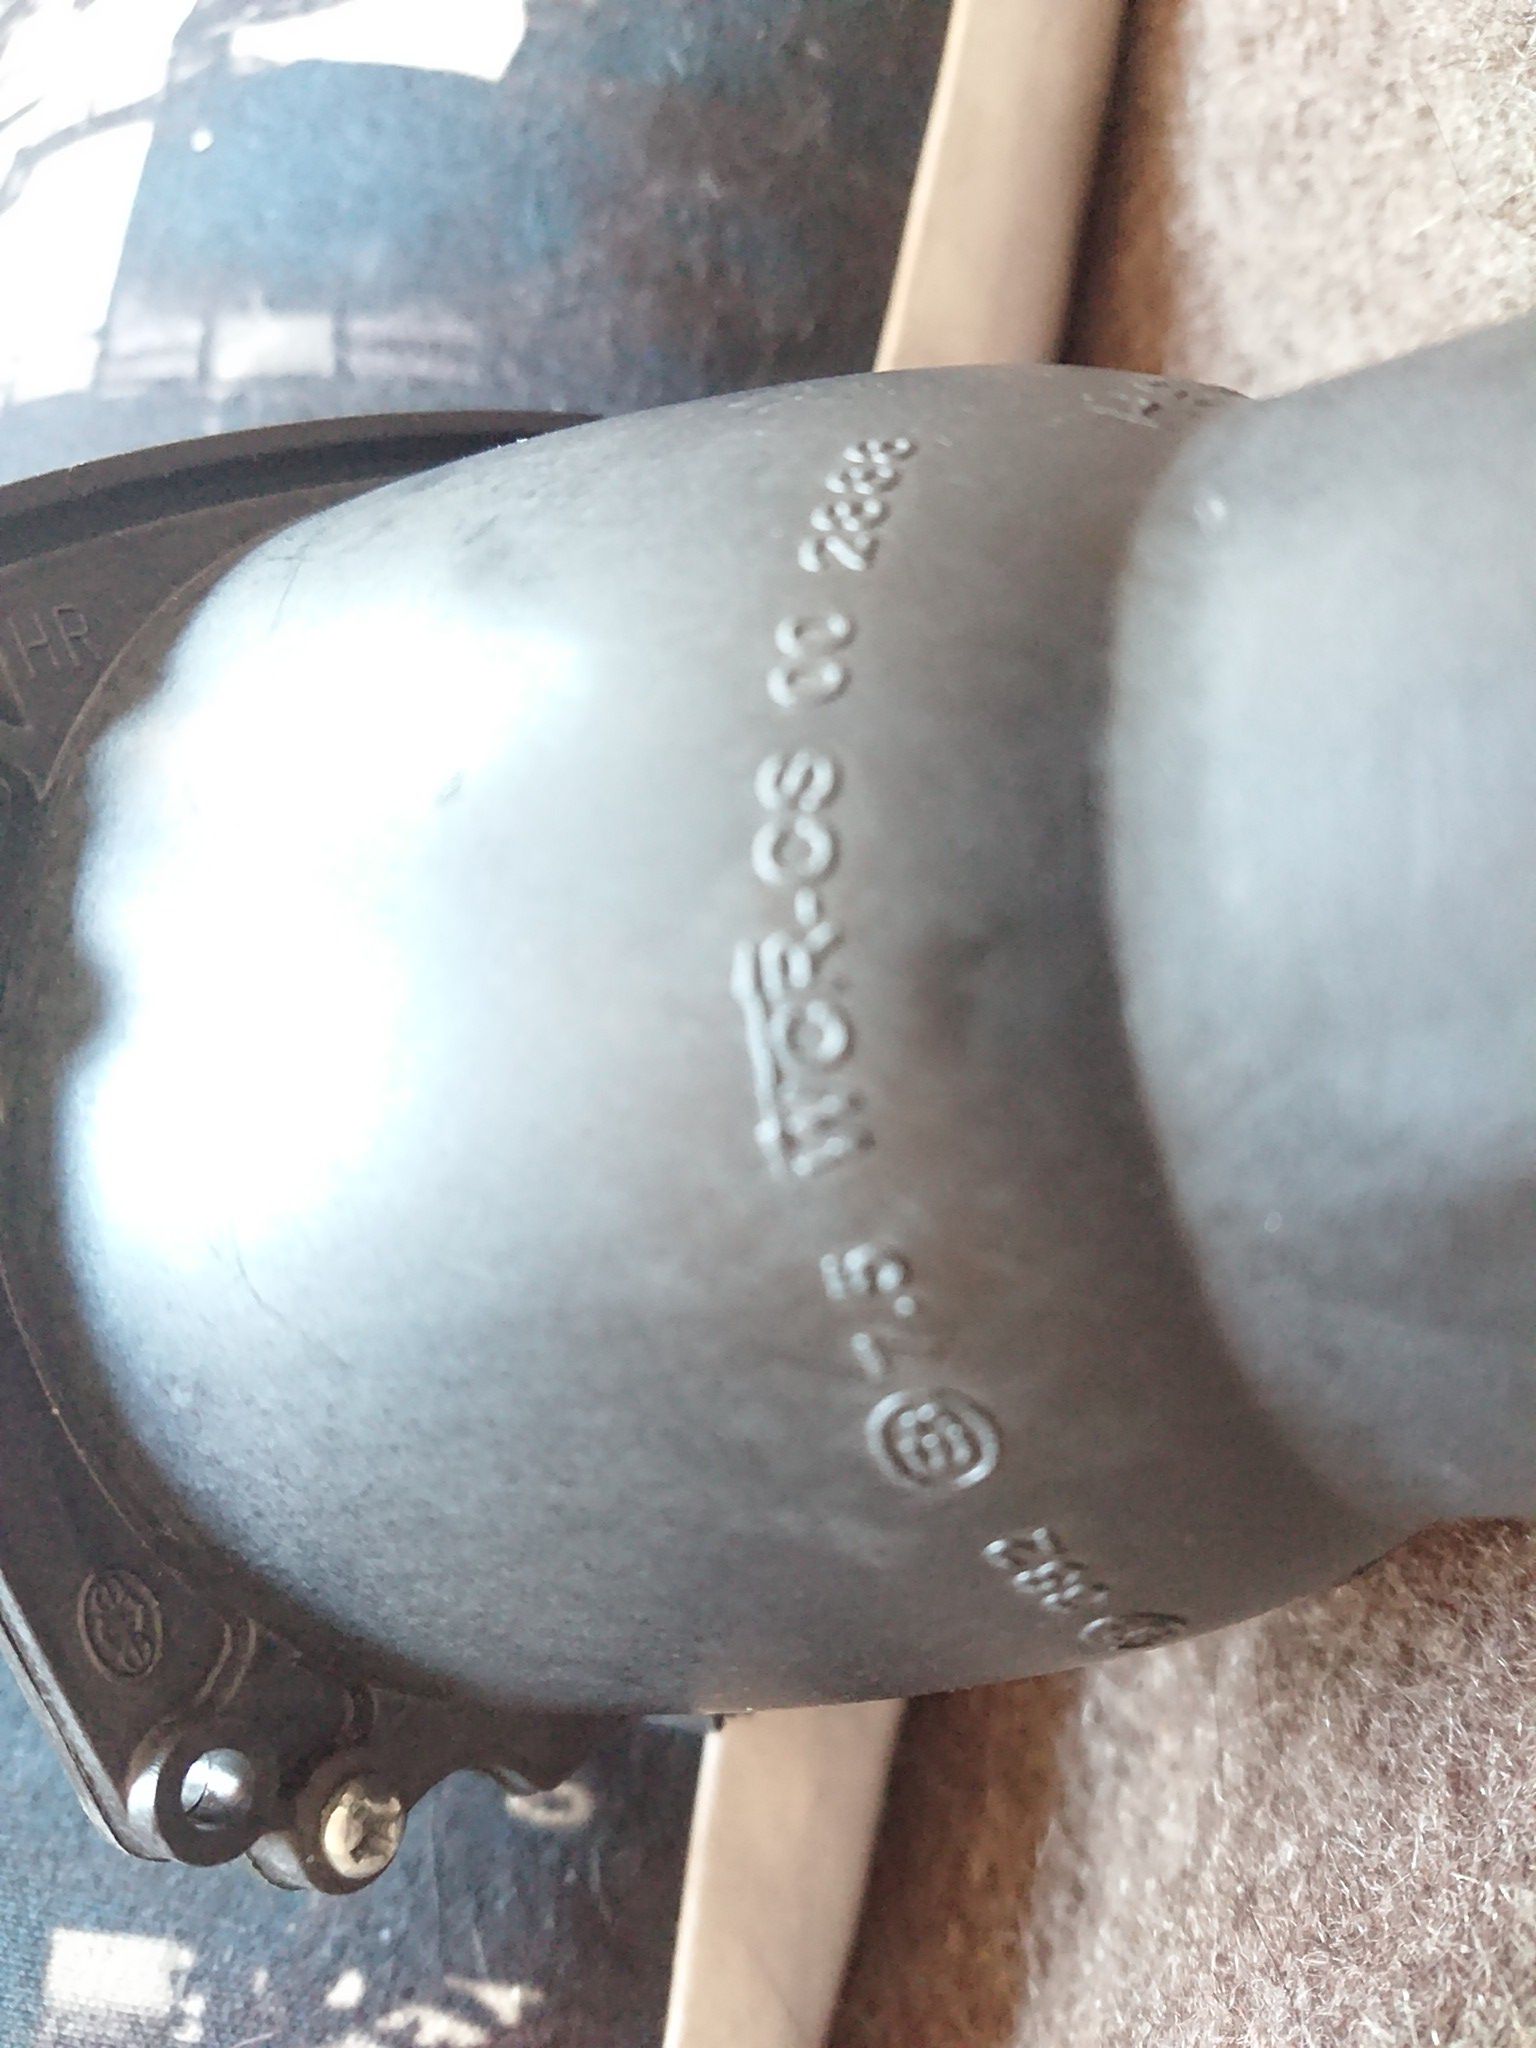
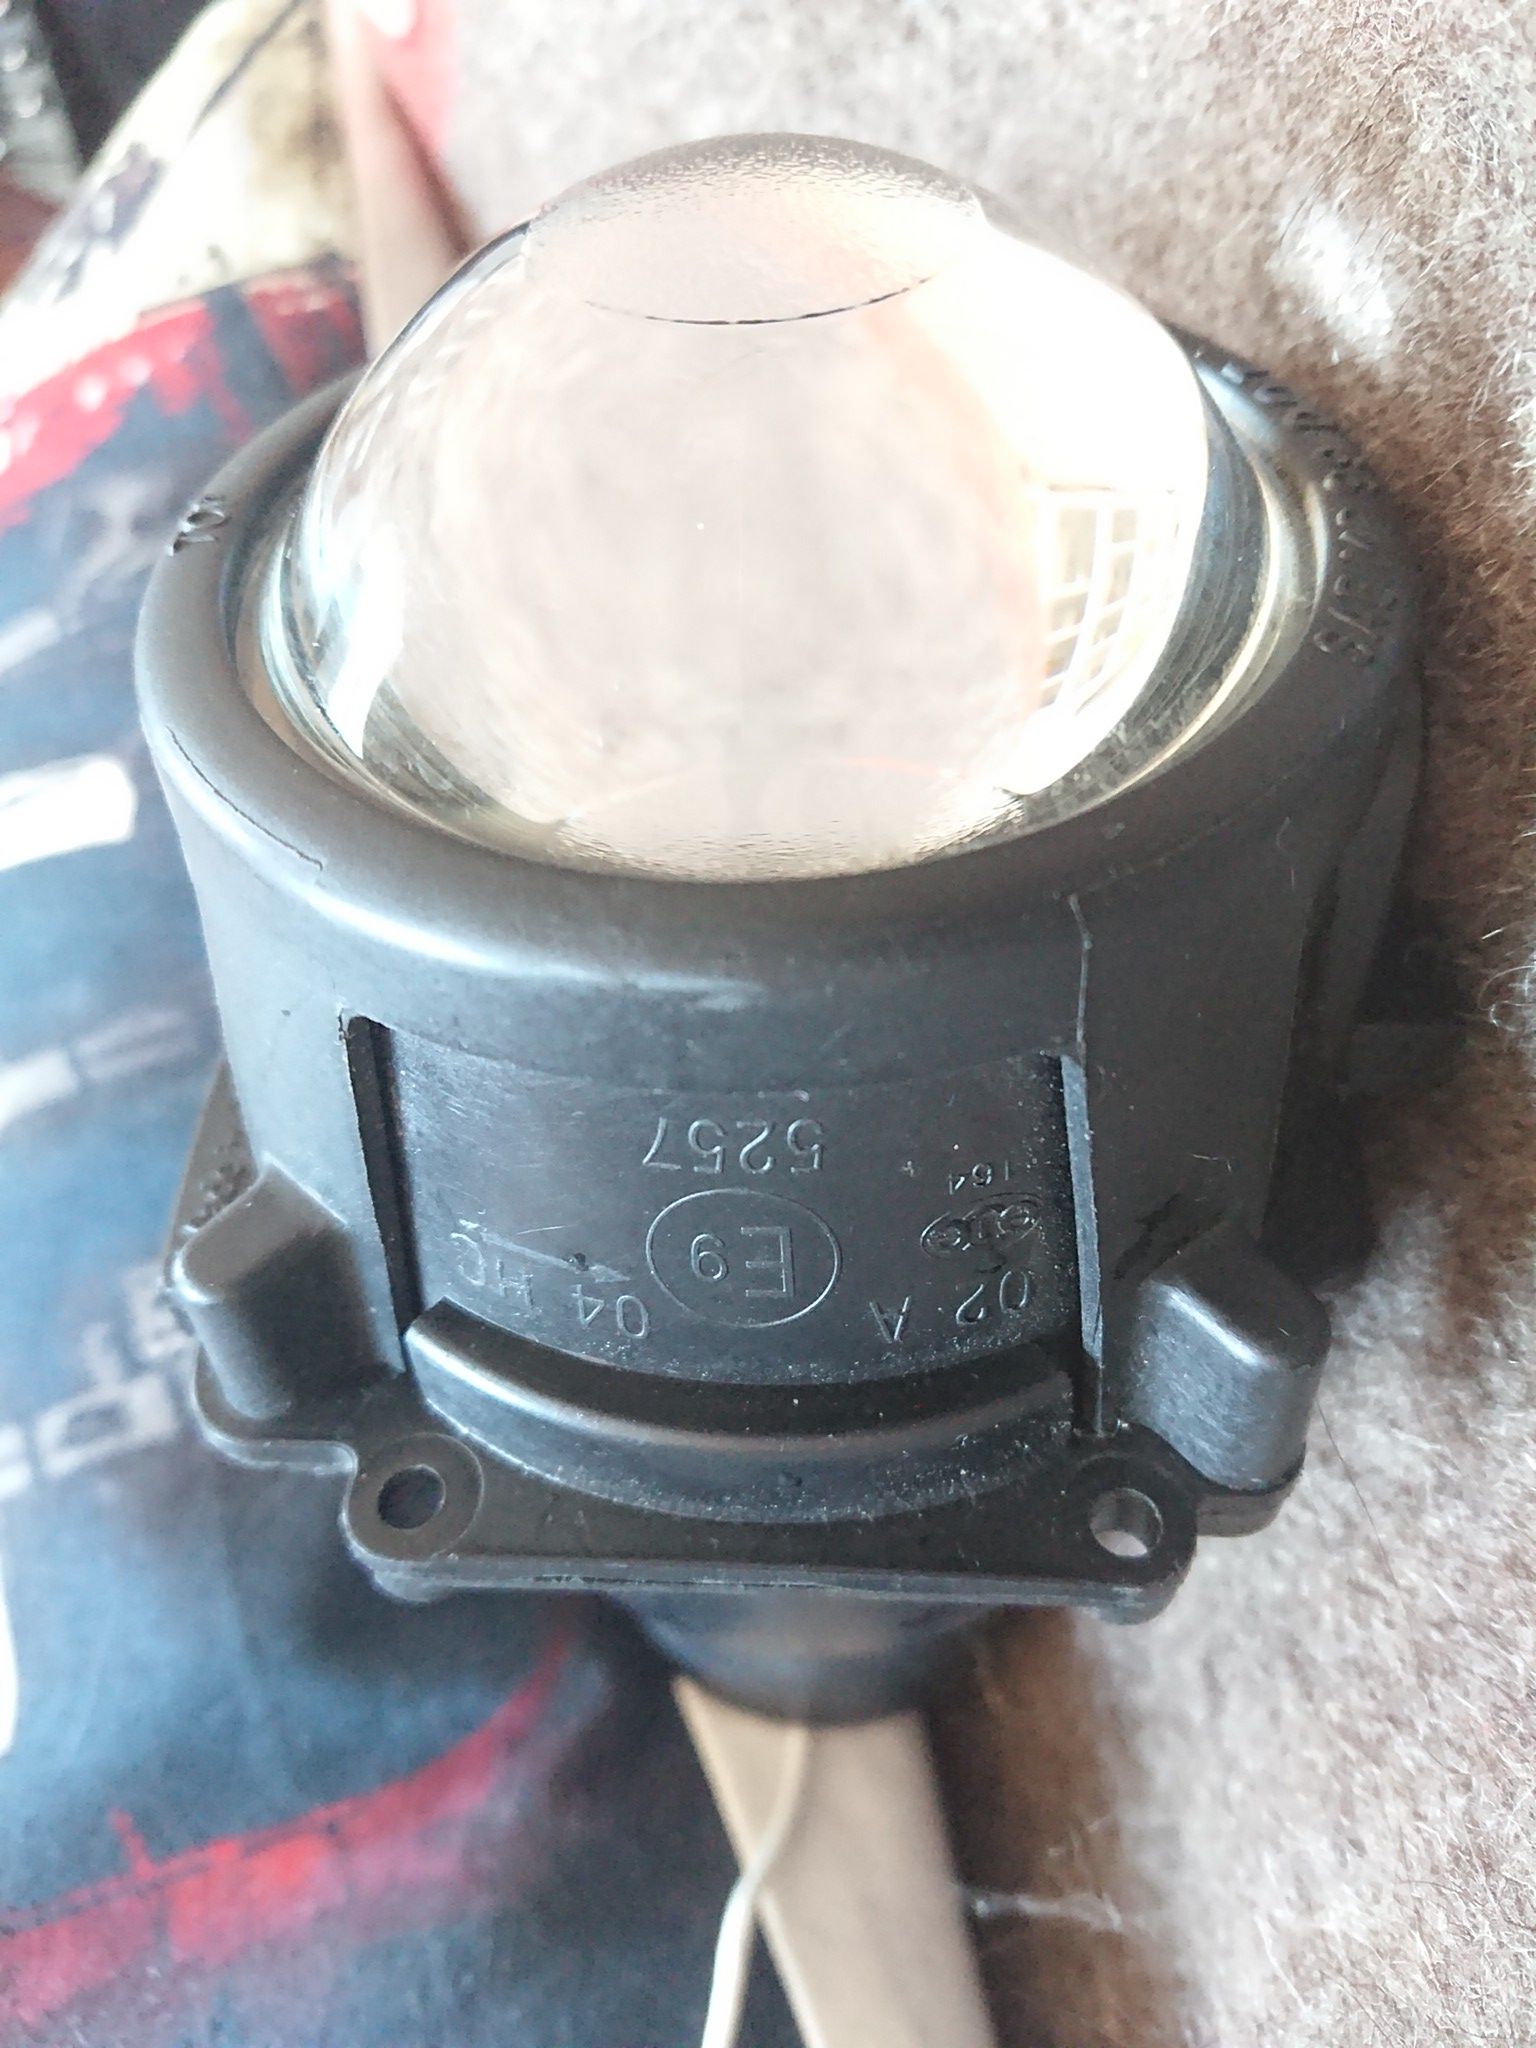
Hella circular reflector unit (possibly the Vision Plus 5¾" conversion headlamp).
2014+
In 2014, the FX acquired a dual projector configuration with a W3W stock running light.

Adjusting angle (2014+)
There are two retaining bolts on each side of the headlamp assembly.
Loosen all four bolts, pivot the assembly to the angle as desired, and then re-tighten to fix it in position.
S Platform Headlamp
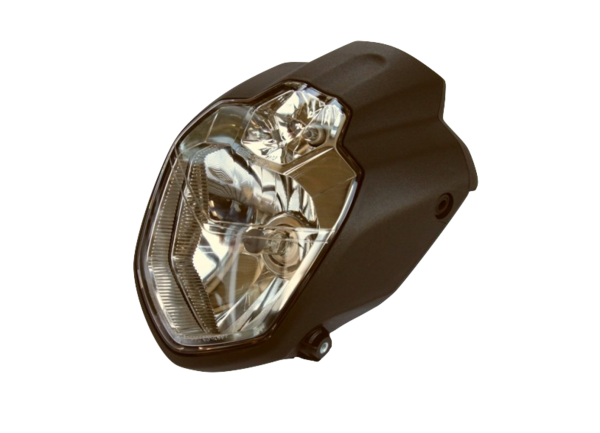 2013+ LSL Urban Headlight
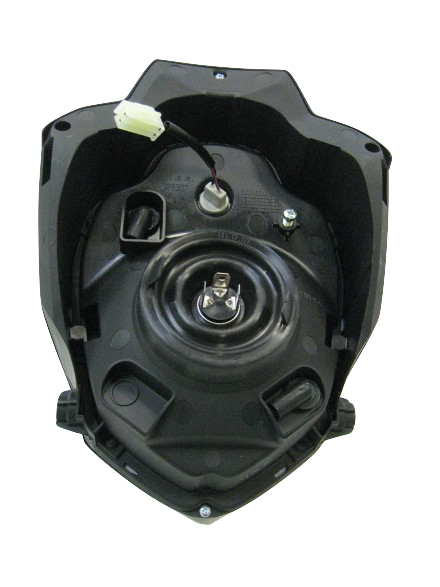 2013+ LSL Urban Headlight (rear)
Pre-2012
Hella circular reflector unit (possibly the Vision Plus 5¾" conversion headlamp).
2012+
For 2012+ models, the Zero's stock headlamp assembly is the LSL Urban Headlight with an H4 bulb in a 9003 / HB2 socket, and a W3W stock running light.
LSL Urban headlight housing dimensions: 190mm width, 260mm height, 125mm depth.
The headlamp housing OEM is by TRIOM with part number T7869010. It can be bought on the Italian market (ebay.it or amazon.it or such) for $100 instead of $160 in the US.
Power
The stock headlamp draws about 55/60W which is the largest regular 12V electrical load by default.
The electrical load doesn't impact range much (110Wh over 2 hours compared to 11+kWh yields 1% range difference), unless you ride a very slow long travel leg for, say, offroading.
However, it does heat up the housing glass.
Bulb Retainer
The headlight is fastened in by a plastic bracket that locks when rotated, and covered with a rubber boot to protect from moisture.
[[../Headlamp Removal|Removal]]
Tools
- 3mm (H3) Allen key
- 4mm (H4) Allen key
Steps
- Unbolt the two lower mount screws with a 4mm Allen key.
- Unbolt the two upper mount screws with a 3mm Allen key.
- Disconnect the headlight and running light wires to detach the assembly completely.
[[../Headlamp Bulb Replacement|Bulb Replacement]]
Video guide
Steps
- Suggestion: Unbolt the headlamp assembly (with 3mm and 4mm allen wrenches) from the metal brackets to get enough room to work.
...unless you have very small hands and move the existing cabling out of the way. 2. Detach the existing bulb's cable at the plug. 3. Pull the rubber cover away from the headlamp. 4. Twist the retaining bracket to release the bulb.
NOTE: Avoid touching the bulb; oil and dirt from your fingers can cause the bulb's surface to heat up while operating and could age the bulb prematurely. Keep the bulb clean. 5. Place the retaining bracket and rubber cover around the new bulb and press and rotate to fix it in place.
NOTE: For a 2013-2014 model, the plastic retaining bracket might require some filing to fit another bulb with its assembly to hold it in and lock properly. Later models have an easier shape to fit.
Calibration
When replacing the headlamp, check the light pattern emitted and adjust the set screw in the headlamp housing to get a suitable projection angle.
[[../Running Light Replacement|Running Lamp Replacement]]
This replaces the W3W running light bulb on the [[../Headlamp|SDS Platform Headlamp]].
Steps
- [[../Headlamp Removal|Remove the headlamp]]
- Turn and/or wiggle the rubbery boot at the rear of the running light to extract it from the headlamp assembly.
Optionally, unplug the running light wiring connector first, if it makes it easier to manipulate. 3. Remove the bulb and insert its replacement.
As with any bulb, take care not to leave skin oil or other residue on the bulb's surface, which could thermally stress it over time. 4. Re-insert the running light by its rubbery boot into the headlamp assembly. 5. Re-connect the running light wiring connector if appropriate. 6. Re-install the headlamp.
Adjusting angle (2013+)
There is a set screw on the upper-right rear face of the headlamp housing to adjust the angle of illumination.
Adjust this while the bike is sitting fully upright.
Remove the lower screws and swing the headlamp on the two upper bolts to access the screw while adjusting.
Turn the set screw clockwise to aim the headlamp down, counterclockwise to aim it up.
Turn Signals
Zero uses a triangle-shaped turn signal housing on a flexible stalk.
The turn signals are oriented so the front and rear are interchangeable if you swap sides going from front to rear and vice versa.
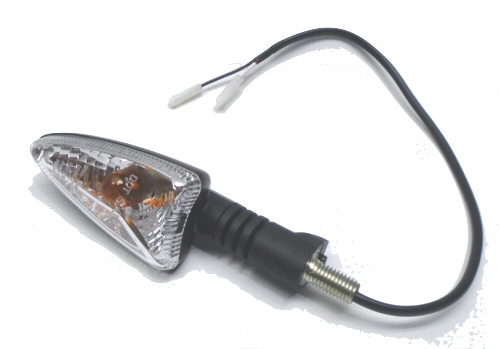 Left-hand front (right-hand rear) turn signal |
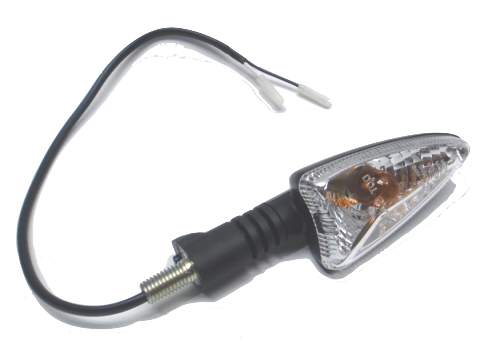 Right-hand front (left-hand rear) turn signal |
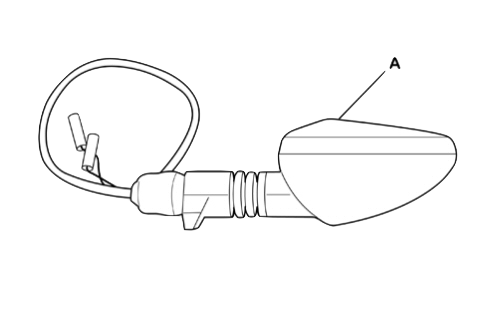 Turn signal drawing |
Maintenance
Always check for functioning turn signals (running light, headlamp, turn signals, brakes).
Connectors
Threaded insert into the headlamp and tail bracketing (not identified, could be M8) with a notch to hold their position.
Barrel-style single wire Molex connectors (2 per signal):
- 1 Pin Molex .062 Female Plug Connector w/Pins 03-06-1011
- 1 Pin Molex .062 Male Plug Connector w/Pins 03-06-2011
Turn Signal Bulbs
2013+ (Gen2, Gen3?)
Type PY10W, similar to 1156, but the side pins are offset by 150 degrees rather than 180.
Also called BAU15S or R10W.
The glass is amber (as the lenses are clear) and smaller, since the regular 1156 glass is too big.
AF1 Racing references #AP8127489 as "amber turn signal bulb, staggered pins"
2009-2012 (Gen1)
Clear 1156 incandescent bulbs, very standard.
Turn Signal Flasher
The turn signal ("blinker") flasher is a simple three prong flasher relay.
It's attached directly by a plug so is easily replaced if it fails (or for an LED compatible unit).
Label
Flasher Unit 12V
2x10W
PN: 8078
Made by Ecie Cheng Du
or
GUILERA
Flasher Unit 12V
10+10W+1,2W
P.N. 013341
Low Noise Revision
As of 2016, the part is revised with the description "low noise".
This suggests reduced electronic and/or audible noise.
This model of flasher relay is noticeably quieter, and that year coincides with reports from Zero management of EU EMF/EMC noise compliance expenditures.
Silent Revision
As of 2020?, the part is from the manufacturer Guilera and makes no audible noise.
This again suggests reduced electronic noise, again likely as a result of EU EMF/EMC noise compliance expenditures.
Wiring
The orientation is specific. Reversing the (+) and (-) wiring may be necessary if you buy the wrong orientation of relay.
Look at the pins with the middle L (center)(Load) pin on top and the B and E below it to each side.
- 2018+: The orientation should be E (-) (left), L (center/top), then B (+) (right).
Ref. report from a 2019S owner
This orientation is know as a CF14 relay per pacificcricket - 2013-2017:
The orientation should be B (+) (left), L (center/top), then E (-) (right)
This orientation is know as a CF13 relay
| Years | Platform | Location | Photo |
|---|---|---|---|
| 2012 | S/X | Under the seat below the fuse block. | 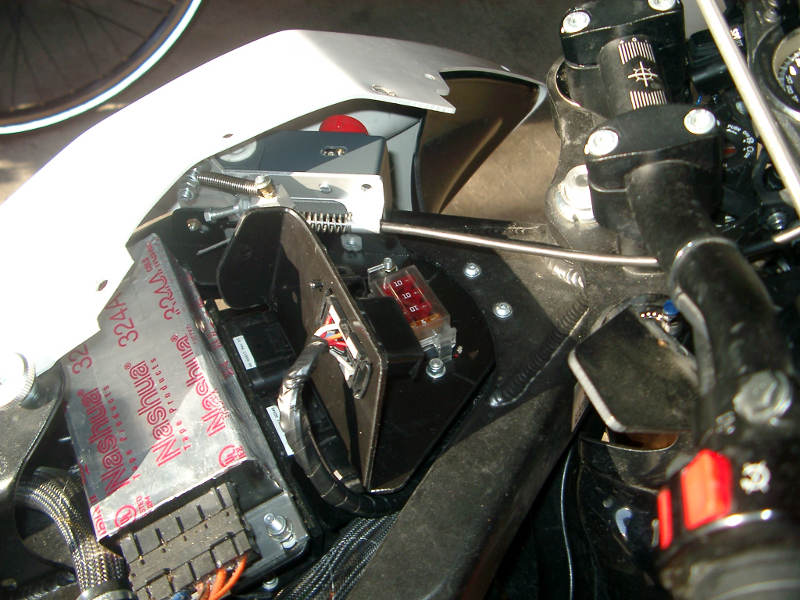 |
| 2013+ | X | Behind the right fairing | 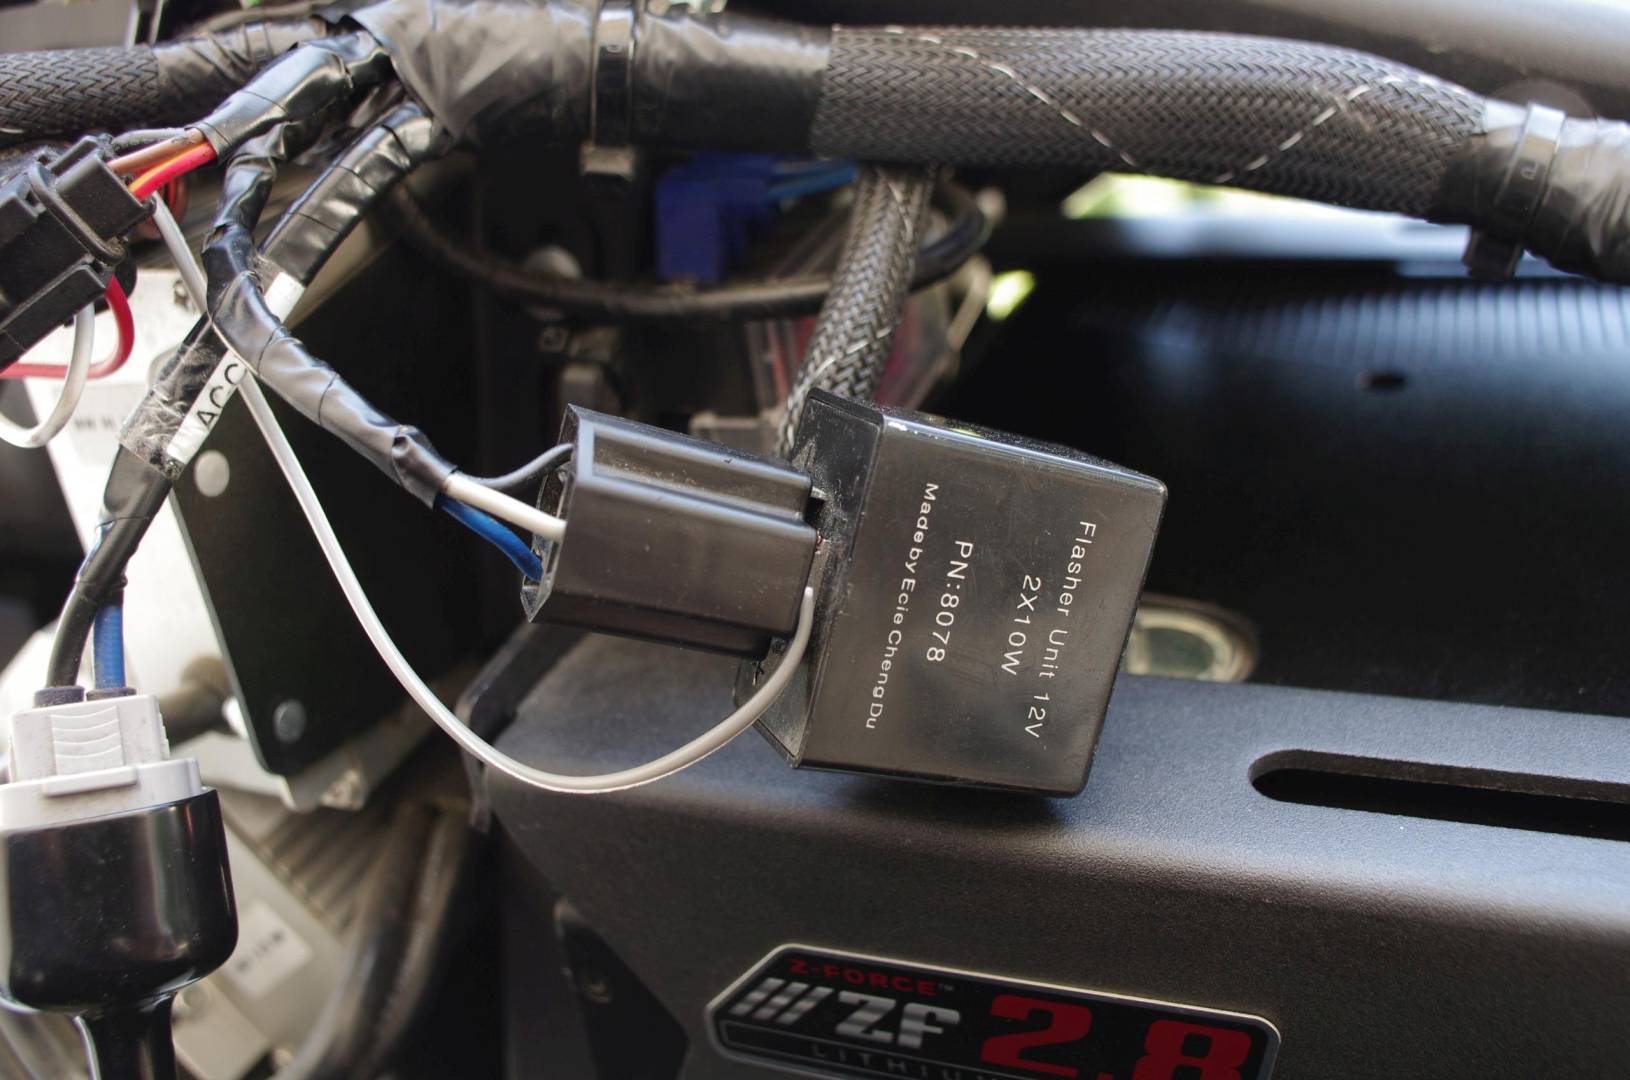 |
| 〃 | S | In front of the front plastics area under the frame "wishbone" with other electrical connections. | 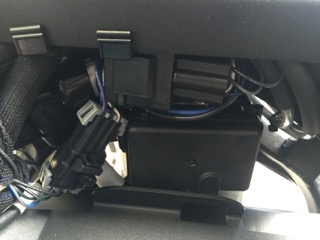 |
Tail Light
The tail light enclosure includes the rear running and brake lights.
The lights inside are LEDs.
The assembly is made by TRIOM, an Italian company.
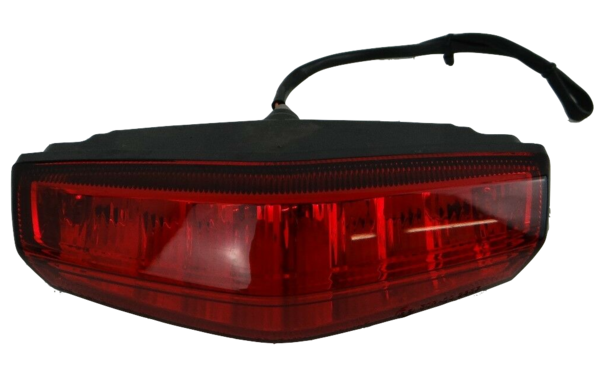 Tail Light (rear)
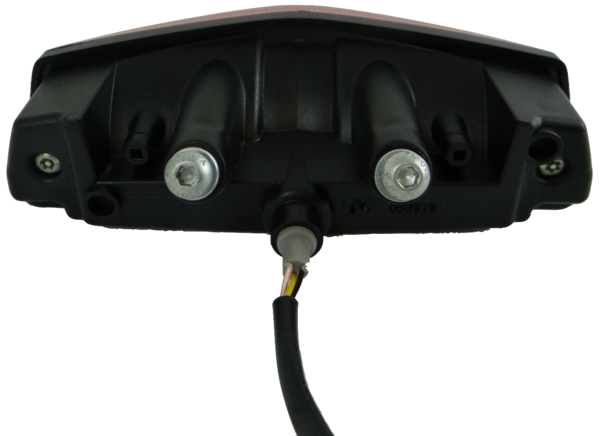 Tail Light (front)
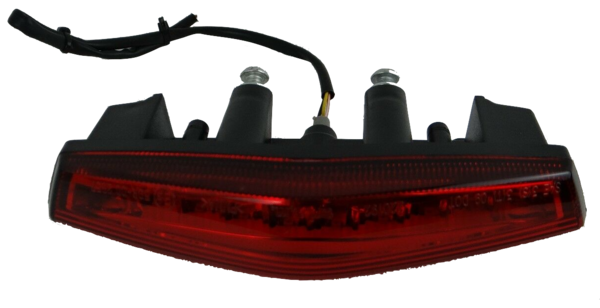 Tail Light (top)
The product made for Zero has not been identified so far, but has shown no failures, either.
Horn
The horn is a K70-H Electromagnetic Disc Horn, P/N 45-06774 for model years 2014-2020.
| Current | 1.5A @ 13V |
| Sound Level | 109dB @ 2m |
| Pitch | 430Hz |
| Weight | 155g |
Switchgear
Fuse Block
The 12V fuse block protects the DC-DC 12V Converter from faults in all the 12V components on Gen2 models.
Gen3 models have a fuse block but the protection has redundant upstream components in the MBB, so the fuse block just helps with isolation.
| Platforms | Years | Components | Rating | Notes | Photo |
|---|---|---|---|---|---|
| S,X | 2013+ | Accessory circuit | 10A | Sumimoto plug (all years) and SAE plug (2014+ years) | 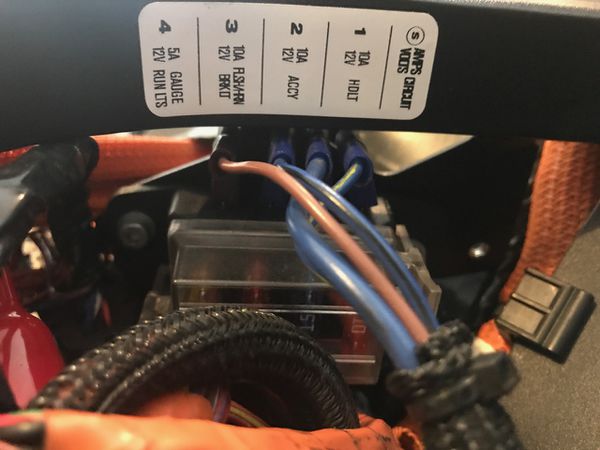 2013 Fuse Block |
| 〃 | 〃 | Headlamp | 10A | 〃 | |
| 〃 | 〃 | Instrument cluster (Dash) running lights |
5A | 〃 | |
| 〃 | 〃 | Turn signals (Flashers) horn brake lights |
10A | 〃 | |
| 〃 | 〃 | Ignition key | 5A | 〃 | |
| 〃 | 2015+ | ABS circuit and the ignition key | 5A | 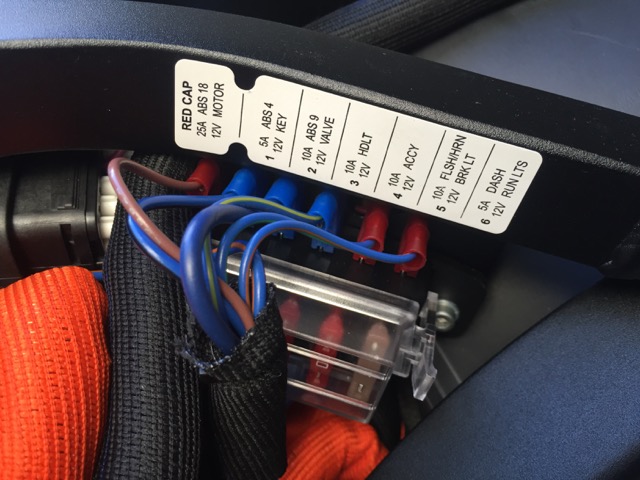 2015-2016 Fuse block (label inaccurate; rotated 180°) |
|
| 〃 | 〃 | ABS pump | 25A | limited duty | 〃 |
| 〃 | 〃 | ABS valve | 10A | 〃 |
Wiring
The fuse block connects to the positive side of the DC-DC 12V Converter output on its left side.
The downstream wires enter a mesh sleeve, through a ferrite ring to clean up RF interference, and lead forward into a larger sleeve that runs (for the S-Platform) along the left side of the forward tank area.
Location (SDS Platform)
Under the seat under the Y-shaped frame join piece's left rear leg.
For 2015+ models, the 25A ABS pump fuse is mounted to the back of the block and may require removing the frame join piece to access fully.
Location (XMX Platform)
On the frame under the right side front body panel.
For 2015+ models, the 25A ABS pump fuse is mounted to the frame above the block.
Location (FST Platform)
Under the rider's seat on the right side.
Ignition Switch
The Ignition switch is a locked turn-key operation for enabling the bike with a reasonable amount of physical security.
The switch is operated by the Ignition Lock.
Location
Through the center of the upper tripleclamp, ahead of the steering stem and handlebars and below the dash.
Routing
The ignition wiring runs under the steering head to the MBB. This implies that the MBB is at least partially powered while the bike is keyed off.
Security
Position the steering in the locked position to prevent easy access to the wiring which facilitates theft/override via "hotwiring".
Connections
MBB pins (per 2013 trace)
- 4 - Orange/White 20AWG
- 5 - Orange/Black 20AWG
Handlebar Switch Housing
The handlebar switch housing assemblies seem generic but have Torx T22 security bolt fasteners making inspection and maintenance more difficult than average.
Kill Switch
The kill switch (or engine cutoff/cutout switch) is a toggle switch on the right handlebar switch assembly prevents motor operation as a separate control from other interlocks.
Mounting
On the right handlebar switch assembly.
Operation
Push up/forward to cutoff motor operation.
Push down to enable motor operation.
When to Cutoff Motor Operation
- Whenever the bike should not be operating.
This is a redundant safety mechanism to prevent injury or damage. - If the vehicle is on its side after a crash or other incident.
This prevents spinning up the wheel. - Whenever someone unfamiliar with the motorcycle is sitting on it or nearby.
If they intentionally or unintentionally touch the throttle, this prevents their lack of familiarity from causing a surprise excursion.
Troubleshooting
The status command in the MBB console can report its reading.
While energized, a voltmeter will indicate 5V across the input leads if the switch is open, and 0V if shut.
While de-energized (and confirmed), resistance across the switch will be high if open, and low if shut.
Connections (Gen2)
It is wired as a digital input to the MBB.
SPST where the off position is an open circuit, for failsafe considerations.
Red 20AWG - (assumed high/positive-5V) to MBB pin 23 (per 2013 trace)
White 20AWG - (assumed low/0V) to MBB pin 24 (per 2013 trace)
Kickstand Switch
The Kickstand has a safety cutout switch (really a sensor) to prevent motor operation while at rest.
 Warning: |
Kickstand Sensor Electrical Equipment Hazard The connector is three pronged and needs to be connected correctly or can damage the MBB irreparably. Do not disconnect or reconnect while the vehicle is keyed on or contactor is shut to be safe. Do not short any wires together to bypass. This is a Hall effect sensor usually containing or using sensitive measurement IC's and therefore not a simple switch. |
Part
From observation, the Asahi Denso CE122 proximity sensor appears to be the part match, also used on some Triumph and KTM motorcycle models.
From the 2016 SR's sensor to its connector, the wires are Blue, Pinkish Red, and Black.
While the bike is keyed on and contactor is closed, Blue measures a stable 5V, Red measures ~2.7V and varies (need to scope this), and black appears to be a signal ground/input (needs verification when I'm not tired).
Some KTM riders with the Asahi Denso CE122 sensor have reported success using commercial bypass kits.
- Reportedly, a KTM sidestand switch bypass kit can work on a Zero without issues.
One such user suggested these are merely a potted 2.2kOhm resistor between the Red and Black wires (link here).
Zero motorcycles can be far more sensitive to faults on signalling pins so this should not be attempted unless you absolutely know what you are doing, and are willing to risk having to replace your MBB.
talonreaper has had luck on a 2016 SR with a 2.7kOhm resistor between the red and black kickstand sensor's wires to get home from being stranded in an emergency.
This is still not advised.
North or South pole magnetism activation? TODO
Connector
The connector appears to be a Sumimoto MT sealed series connector MT-3S-2, p/n 6180-3241.
Ref. Corsa Technic reference page for 6180-3241
This connector appears to be a very standard application for Japanese motorcycle interlock sensors for sidestands/kickstands.
Troubleshooting
Raise the kickstand for testing only with the rear wheel lifted off the ground via a stand or lift.
The status command in the MBB console can report its reading.
Maintenance
An unconfirmed suggestion per this Side stand safety switch discussion on EMF:
Since I was worried about the condition of my side stand safety switch and never having looked at it before, I got on my hands and knees under the bike and checked it out.
I noticed that there were a couple of wires that went into a plastic sheath that protects the wires and their connections within the switch housing from damage.
But I also noticed that the sheath's opening faces forward and it seemed like water and muck could be forced into the opening and perhaps short out the switch contacts under extreme conditions.
So what I did was to squirt some silicone sealant into the opening and sealed it off.
Hopefully, that will eliminate any possibility of water getting into the switch when riding on wet streets.
Bypass
If there is a compelling justification worth risking warranty damage, the sensor interlock preventing operating the powertrain may be bypassed.
The bypass should be performed via MBB settings configuration.
| Pin # | Wire Color | Wire Gauge |
|---|---|---|
| 10 | Yellow/Black | 20AWG |
| 11 | Orange/Black | 20AWG |
| 27 | Red | 20AWG |
Removal
Replacement
See Kickstand Switch Replacement
Tail Wiring
Tail wiring includes the tail lights (running and braking power), each rear turn signal, and the license plate illuminator.
| Photo | Connector | Function | Wire Color |
|---|---|---|---|
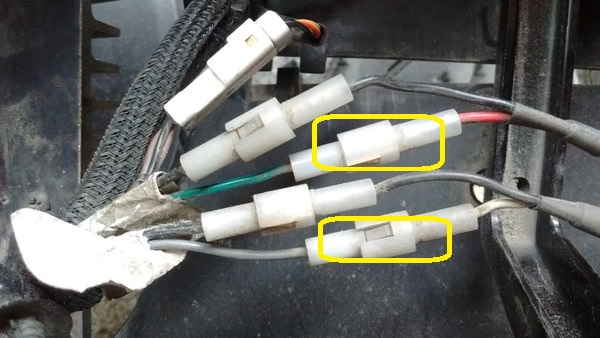 |
Standard Suzuki or Honda brake light (3-wire) | Tail light power | Brown |
| 〃 | 〃 | Brake light power | White with red stripe |
| 〃 | 〃 | Negative/Return | Black |
| 〃 | Single pin connector Socket: Molex 03-09-2011 [15] [16] Pin: Molex 03-09-1011 [17] |
Left turn signal power | Green |
| 〃 | 〃 | Negative/Return | Black |
| 〃 | 〃 | Right turn signal power | Grey |
| 〃 | 〃 | Negative/Return | Black |
Note about Braking Regen
Braking regen is activated by the pressure switch on the front brake lever or hydraulic switch on the rear brake pedal, through the rear brake power circuit.
If that circuit doesn't complete (due to a failed bulb or wiring disconnect), braking regen seems to not activate.
Routing
Tail wiring runs through a sleeve by the controller on the left side.
Ensure it is protected from chafing by the controller cover.
Turn signal wires run through a pair of holes where the tail stalk meets the subassembly underneath the tail.
Schematic
S-Platform Schematic
Burton has been maintaining this Zero wiring diagram based on his now-highly-modified 2013 Zero S.
It is schematically correct for that year but could use improvement relating the physical routing and there are missing details like the precharge circuit.
Routing
Diagrams
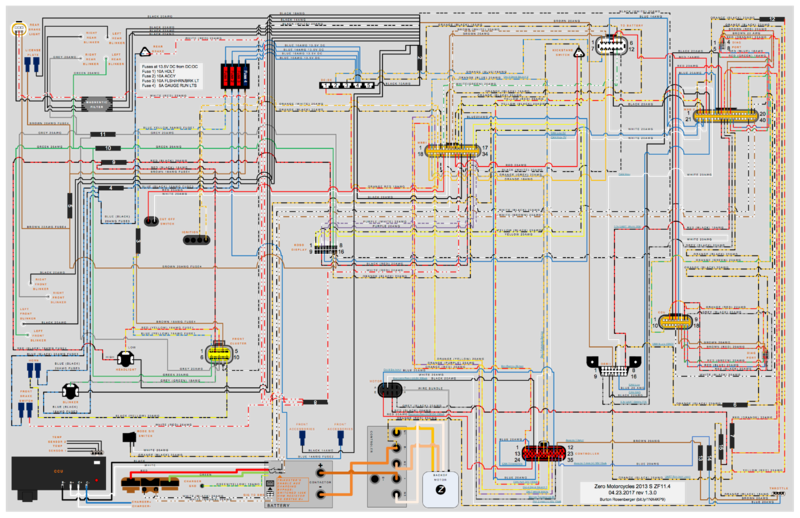 2013S wiring diagram preview
Latest versions
2015+ Notes
the 12V fuse block has more slots for ABS, at least, and the cabling layout is denser.
X-Platform Schematic
See the XMX electrical routing article for the layout of these wires and cables.
| Latest version 1.1 PDF |
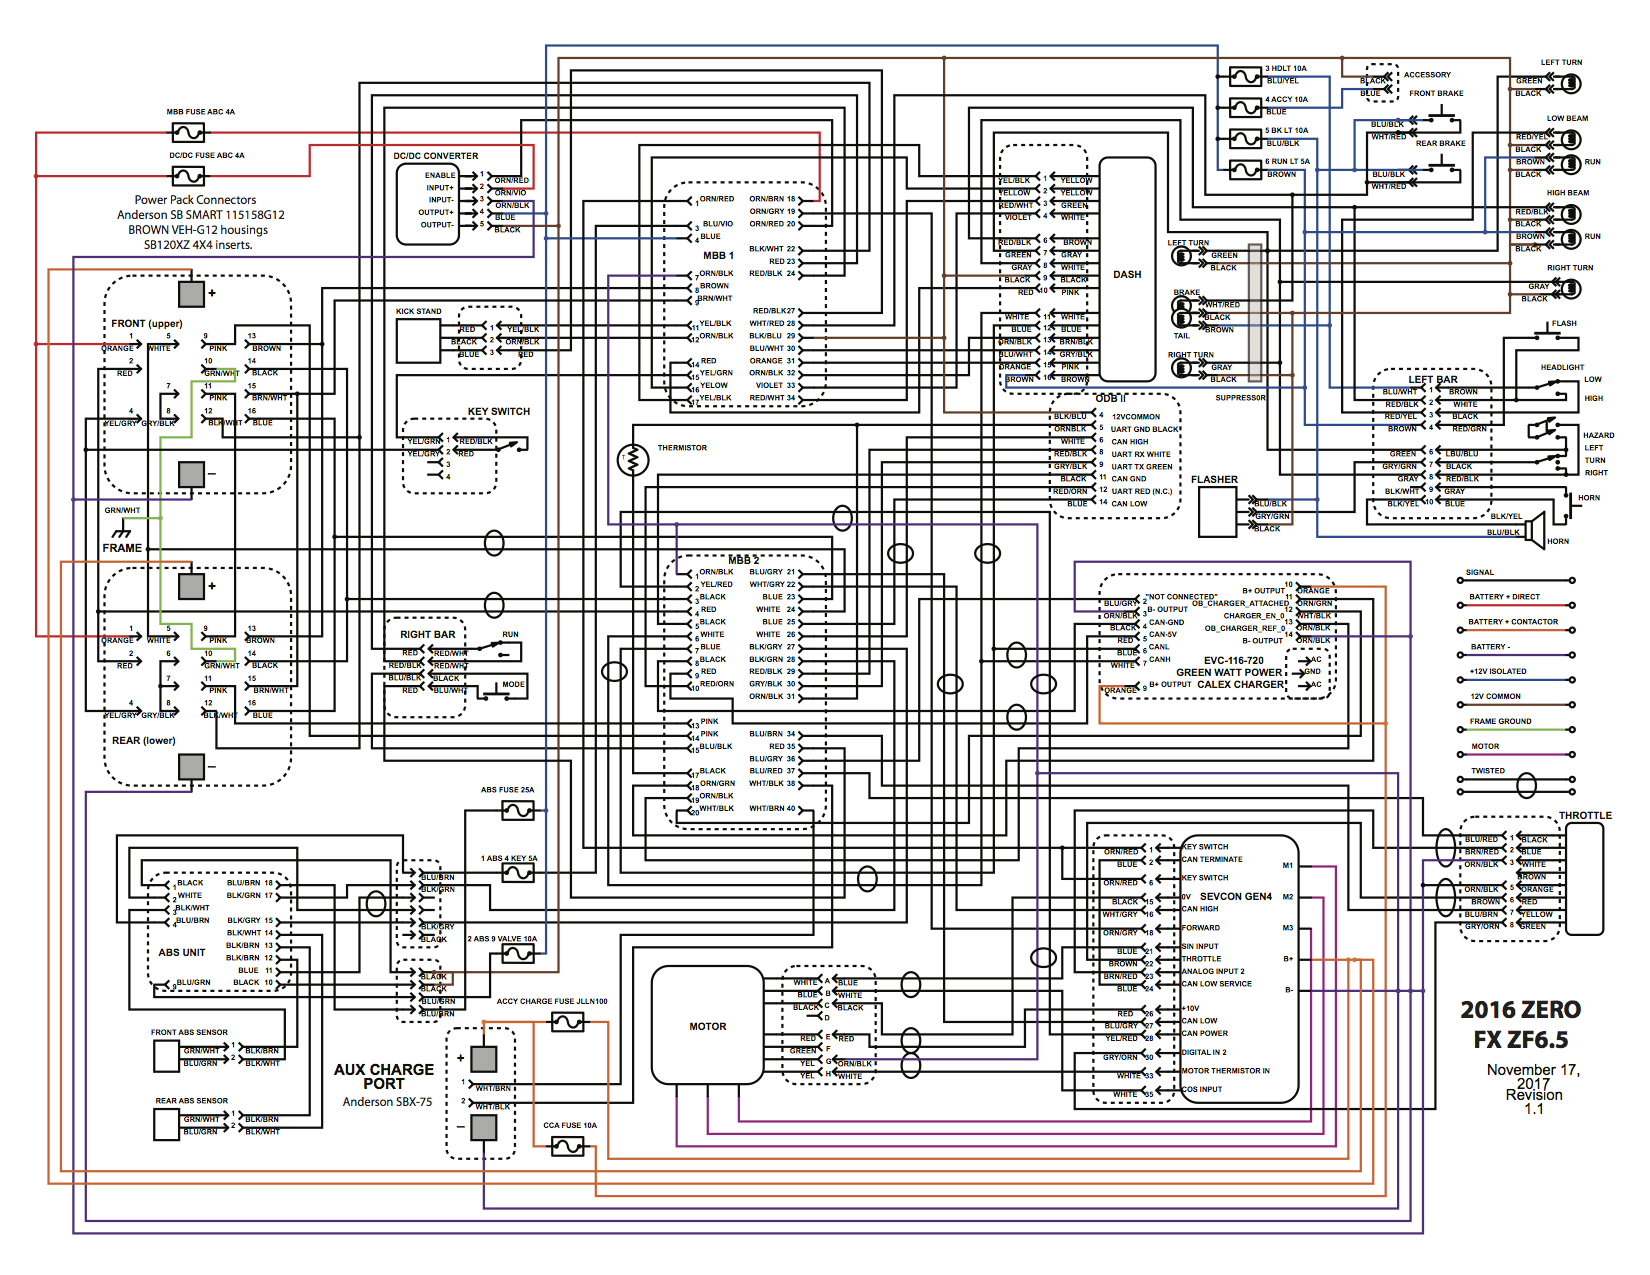 |
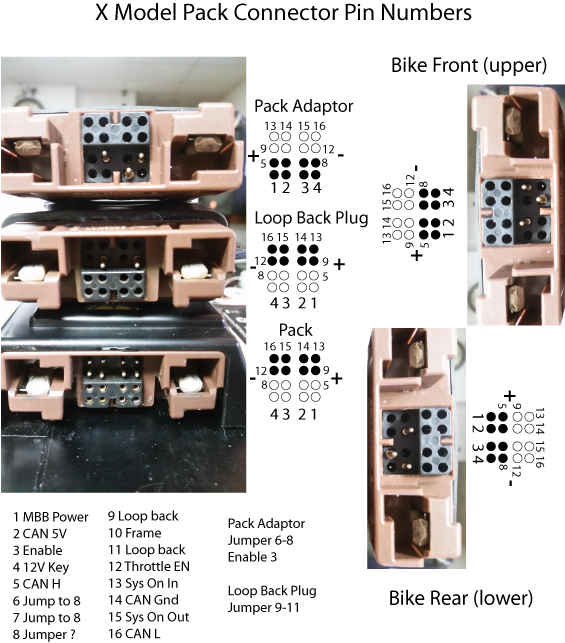 |
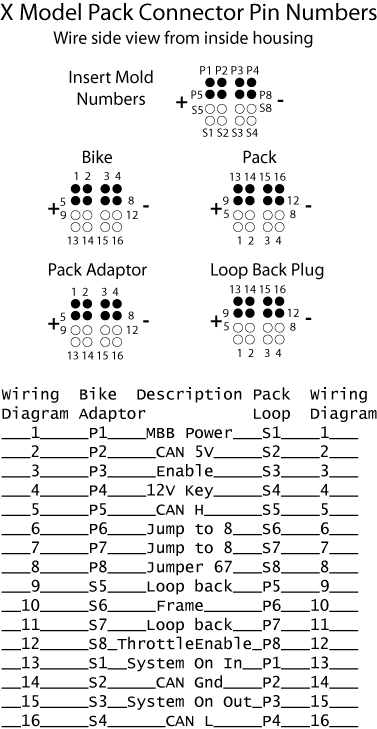 |
Earlier Model Years
Zero DS 2011 wiring diagram forum thread with a 2011/2012 XU diagram
OBD-II Port
Zero models all have an OBD-II port that is reasonably accessible for troubleshooting, diagnostics, and data collection.
Its wiring is non-standard; to connect, we offer the following references:
- How to build a cable to access the MBB for how to build a cable to work with it.
- The aftermarket section on OBD-II solutions.
OBD-II Port Location
| Platform | Years | Photo | |
|---|---|---|---|
| S | 2011-2012 | In the tank area facing the forward frame join where the fuse block sits. | |
| SDS | 2013 | Above and behind the motor next to the accessory charging port, on the left-hand side. | difficult to photograph |
| 〃 | 2014-2015 | Above and behind the motor next to the accessory charging port, on the right-hand side. | difficult to photograph |
| 〃 | 2016+ | Under the seat on the left side just behind frame bulkhead that the tank plastics rest on for 2016 models. | 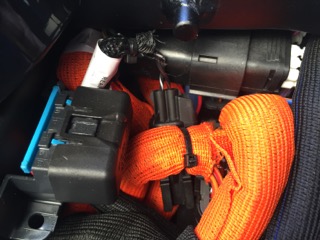 |
| XMX | 2011+ | Under the left side tank plastics. | 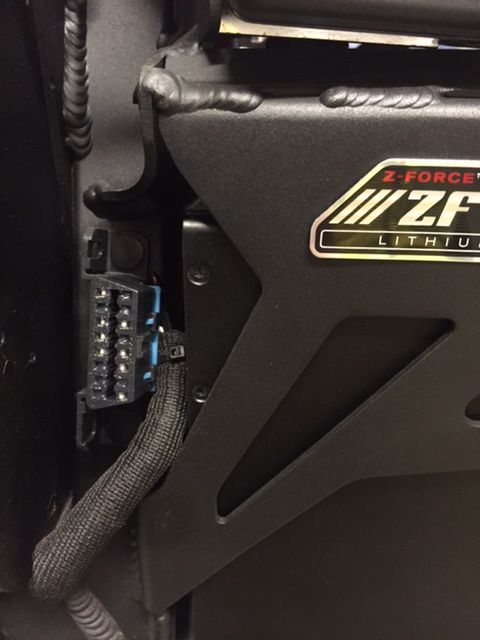 |
| FST | 2020+ | Inside the tank storage compartment |
Routing
S Platform Routing
S Platform Power Cable Routing
Power cabling transmits full traction power from the battery to the controller and then to the motor.
The cables are very thick, armored, and are covered in an orange mesh wrap for abrasion resistance and to indicate the danger involved if the cables are damaged.
Battery to Controller
- B+ (positive) and B- (negative) cabling runs in the power harness from the back of the monolith or long brick pack to the B+ and B- terminals on the motor controller.
The position of the routing from the back of the battery varies by pack geometry: - 3- or 4-brick monoliths will have a doghouse on top but the main power coupling will be lower on the rear face. - Longbrick packs reside in the forward half of the monolith area of the frame with the doghouse on top. The power coupling seems to run along that top face of the compartment.
The cables enter the central area of the frame and rise forward of the board mounting plate to emerge in front of the controller and run rear towards the lugs. - Power Tank cabling runs from the doghouse on that brick to the same B+ and B- terminals on the motor controller.
The cabling needs to route under the frame arch that supports the tank plastics and seat, typically under the right corner.
The cabling then extends back under the Y-shaped subframe piece to the controller terminals.
Power tank cabling lugs should be stacked above the main pack's lugs on the motor controller terminals.
Controller to Motor
M1, M2, and M3 phase cabling runs from the corresponding terminals on the motor controller.
The cables run forward from the phase terminals, below the Y-shaped subframe piece and then down the right inside of the vertical frame stanchion to the motor, behind the board mounting plate.
The cables are really affixed to the motor, so it's more accurate to say they run up from the motor through this area of the frame and then emerge and run back to the controller.
Charging Cable Routing
The charging cables transmit power from the Onboard Charger and the accessory charging port to the main power packs via the main bus.
Routing
On 2014+ models with Calex chargers, the Onboard Charger DC output cable runs along the right side of the rear face of the Monolith compartment, where it joins via Anderson SB50(?) brown connector to the charging circuit to the main pack.
The accessory charging port cable runs forward from the underside of the board mounting plate up through the charging circuit fuse to the main pack.
Since the main pack may be a 3 or 4-brick Monolith or a Longbrick, the routing varies in how it reaches either the doghouse or the back plane of the battery. - XMX Platform
See the XMX electrical routing article to see the layout of these cables.
S Platform 12V Routing
This describes routing for the 12V electrical system on SDS Platform models.
For power cable routing, see the Power Cable Routing article.
Under The Seat
The 12V fuse block is bolted under the Y-shaped frame bracket under the seat.
The underside terminals lead to the positive terminals from the DC-DC converter below on its left side.
(The following picture has one flaw: the fuse label is rotated 180°; layout is reverse of the label)
The terminals on top enter a mesh sleeve, through a ferrite ring to clean up RF interference, and lead forward into a larger sleeve that runs along the left side of the forward tank area.
The 12V accessory port cable is lower gauge than the others and has a crimped connection that splits into two circuits for 2014+ models.
The positive side crimped connection is just two inches from the fuse block under the first sleeve, wrapped in vinyl self-adhesive tape.
Video Guide
Tank Area Left-Side Routing
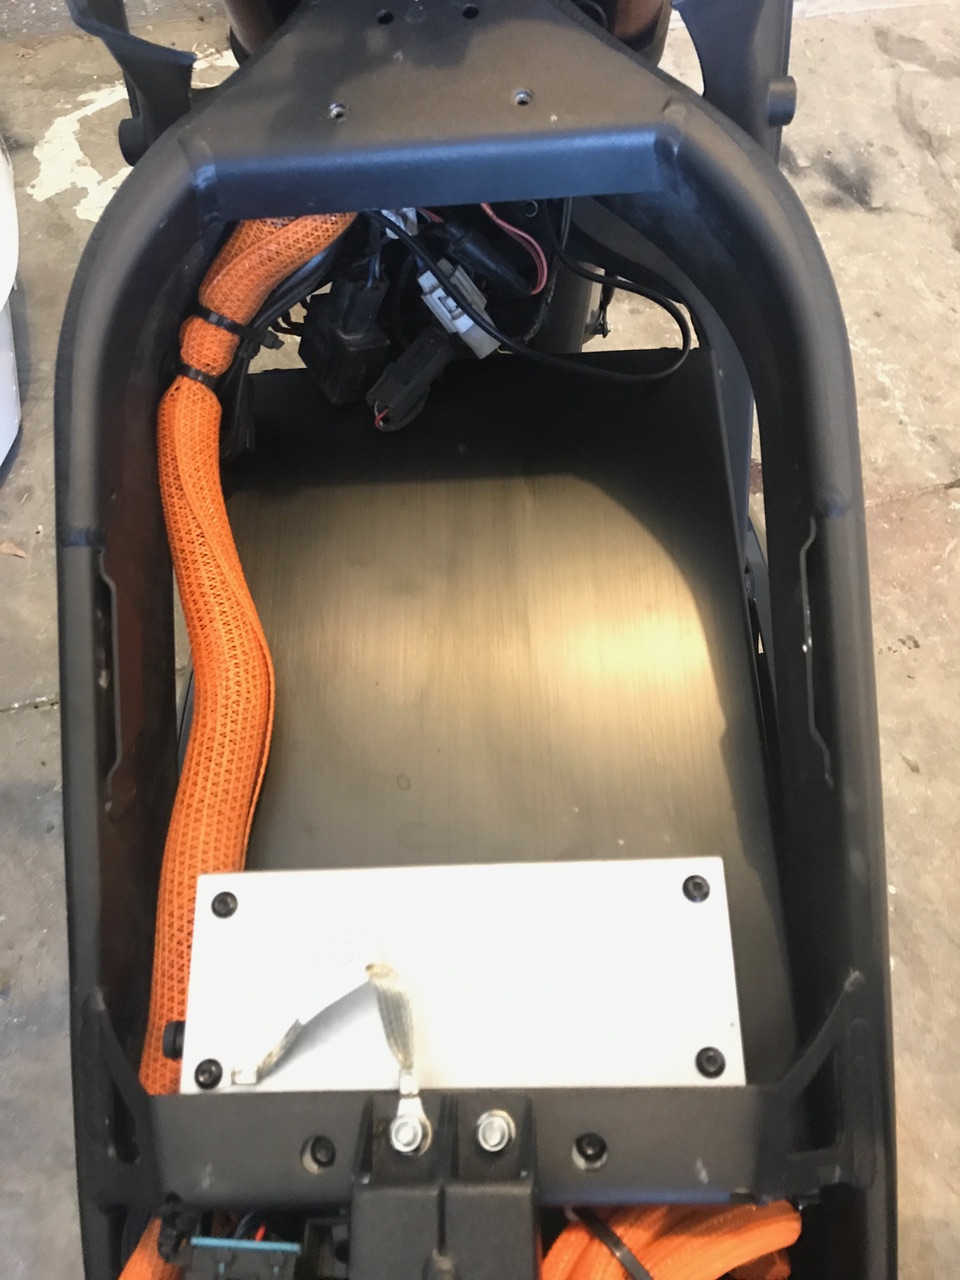
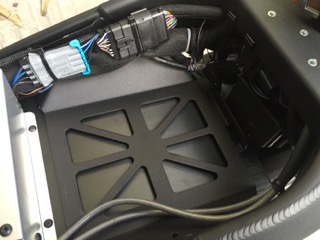
All cabling leading to the steering controls and instrument cluster runs along the left side of the frame tank area wrapped in a bundle.
The largest connector on the left side leads to the instrument cluster. There is a smaller 4-pin connector there for ABS circuits (probably).
Negative/Return
The negative side connection for all of the forward 12V circuits is halfway along the tank area under a longer stretch of vinyl self-adhesive tape.
The merged output leads back down to the DC converter between the forward seat and the motor.
Tank Area Front Mounting
A group of components are clamped to the underside of the front part of the frame in front of the tank:
- The turn signal flasher relay.
- 12V accessory ports: Sumimoto connector and the SAE connector (2014+).
- The 3-pin headlamp connector.
Tail Routing
Towards the tail, one sleeved bundle runs past the controller on the left side and handles:
- Turn signals
- Brake and running lights.
- License plate illuminator.
The turn signal wires run through a pair of holes where the tail stalk meets the subassembly underneath the tail.
X Platform Routing
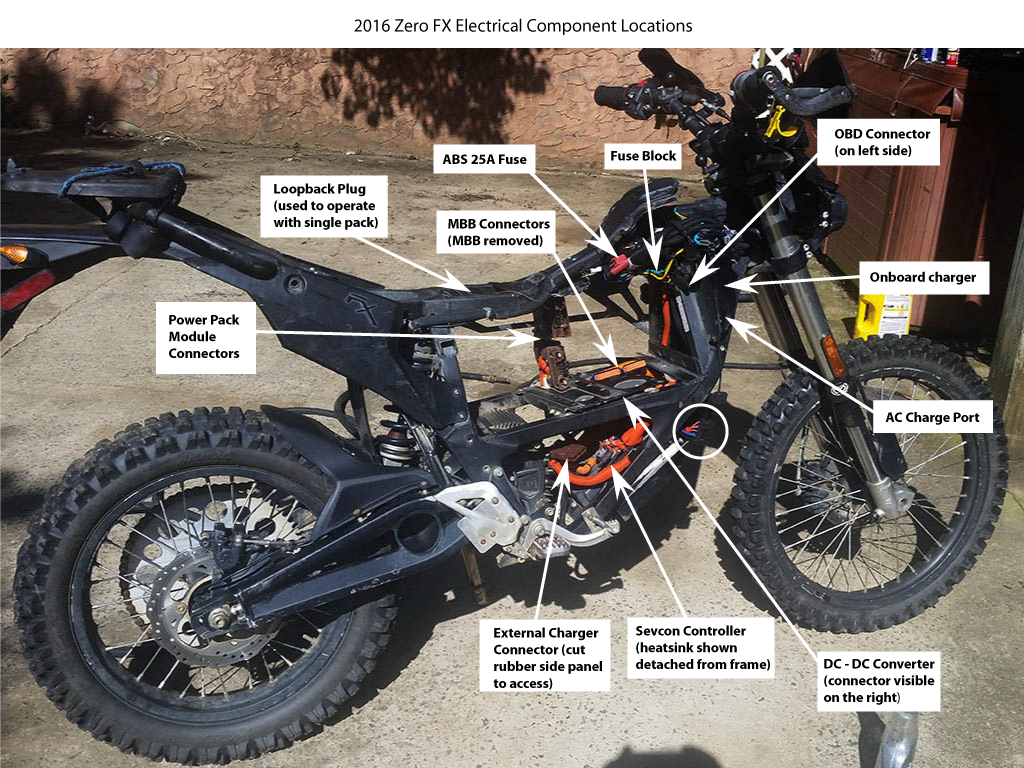
Overview
The 12V fuse block is located behind the right hand front body panel.
The turn signal flasher relay is also under the right panel.
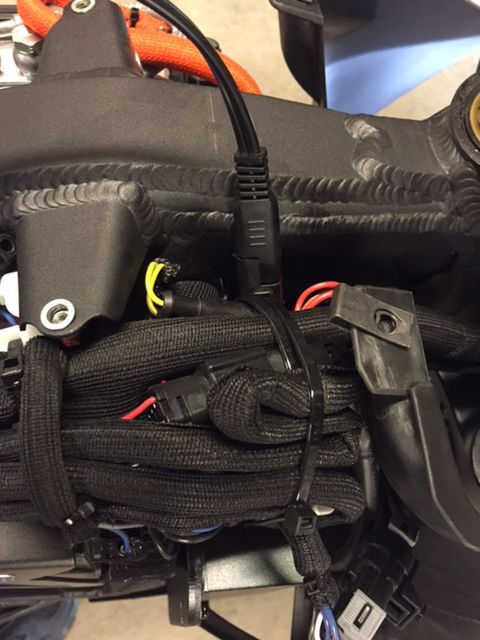
The SAE connector is located under the bundle of wires on the right side front body panel.
In the following photo, the cable is on top, but it can be routed around.
It only has power when the motorcycle is keyed on.
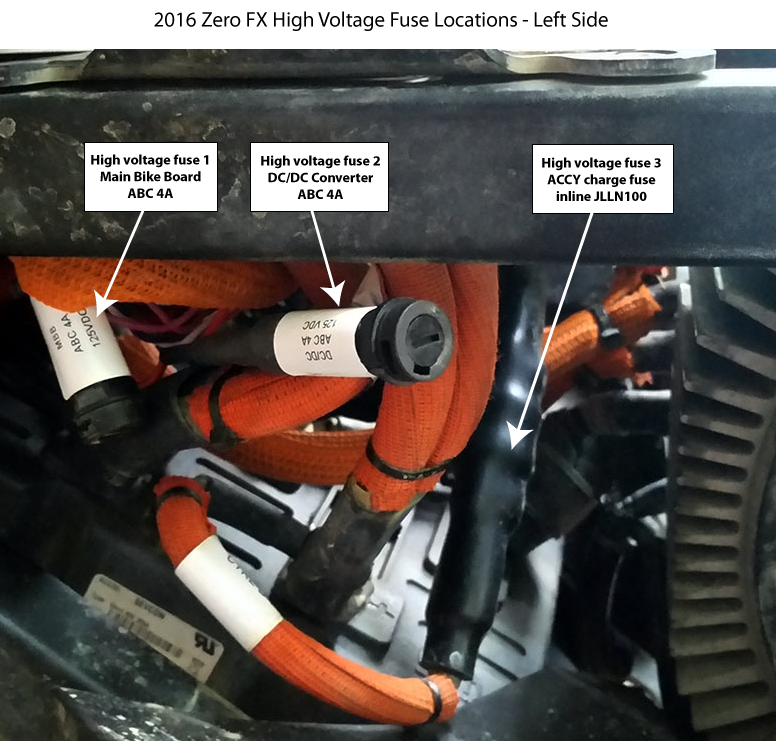
High Voltage Fusing

Source: zeromanual.com/wiki/Unofficial_Service_Manual · Wayback capture of 2025-02-26 · wiki last edited 10 July 2020 00:05. Community-written content from the Unofficial Zero Manual, reproduced for preservation; not written or verified by OpenZero. Links to pages that were not mirrored go to the Wayback Machine.